This comprehensive resource page is a one-stop destination to enhance your communication skills and elevate your academic impact. Whether you want to create impactful scientific posters, deliver compelling presentations, or improve your communication proficiency, we've got you covered. Our carefully curated collection of resources, including step-by-step guides, templates, video tutorials, and best practices, will equip faculty, researchers, and students with the tools to communicate complex research findings and discoveries effectively.
Media Training & Digital Presence
Scientific Presentation
Scientific Posters
-
Templates
We support both PC and Mac platform. A poster can be created with the following software applications PowerPoint, PDF, Illustrator, and Publisher. We accept files through email to the following bret.poster@vanderbilt.edu, CD or USB drive. See Pricing & Payment.
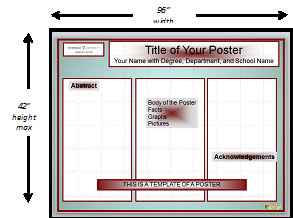
a) The text boxes on your poster should not be overlapping.
b) The information on your poster should not go beyond the top, bottom or outside margins to allow for variations in printing.
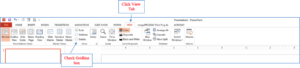
The following applications Microsoft PowerPoint 2013 header look like picture below:
- Please used standard fonts like Arial or Times. Use of non-standard fonts or special characters could lead to missing characters after printing.
- Create a new blank PowerPoint layout presentation.
- Click on View Tab.
- Turn on gridelines to help line up your figures and text boxes. This will display horizontal and vertical lines on the blank presentation.
- Note: See Advice & Tips for additional information on creating poster that print successfully.
-
Design Resources
If you have created slides using PowerPoint, you will find that it isn't challenging to create a poster. However, what you see on the monitor is not always what you get when the sign is printed on the poster printer. We have compiled this list of tips to help you avoid common mistakes that lead to printing errors. Please use these guidelines when creating your poster. If this is the first time you're using PowerPoint to make a poster, browse our Set-Up Guide for additional information.
- All posters should be submitted two business days in advance of pick-up time. Before large scientific meetings, we suggest that you allow additional time.
- Add a 1-1.5″ border of white space on all sides of your poster to accommodate variations in printing.
- Use standard fonts like Arial or Times New Roman; other fonts may not print correctly.
- Type all special characters (e.g., Greek/mathematical symbols)directly in PowerPoint rather than copying and pasting them from another document. We have found that special characters pasted into PowerPoint tend to print incorrectly even though the character displays correctly on the monitor. Insert special characters by clicking Insert >> Symbol >> [texture].
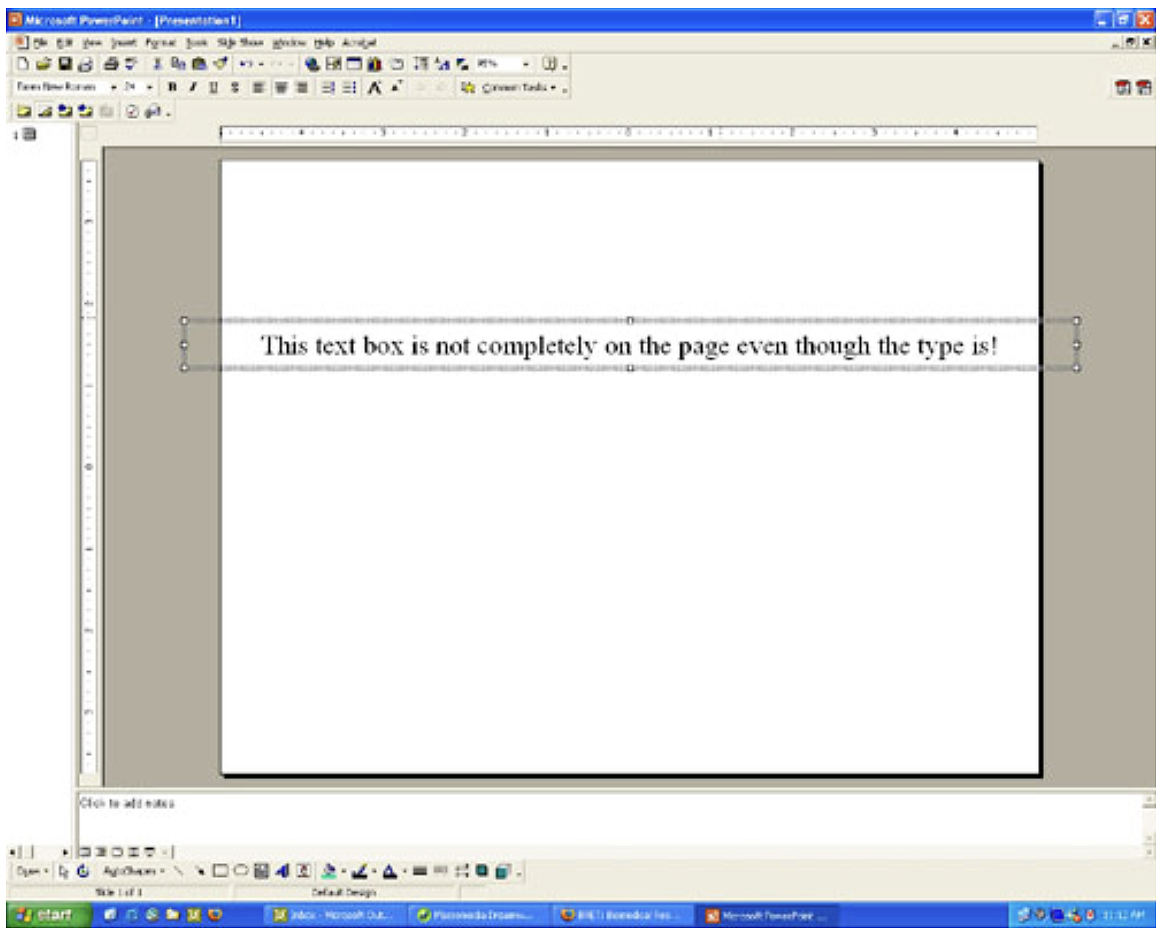
- Make sure that text boxes are on the page. Even if the text appears on the page, the text box may extend beyond the edge and cause the reader to shift when printed. See figure.
- Insert figures and graphs using the "Insert" function, not by copying and pasting the image or figure into the document. Click Insert >> Picture >> From file >> [filename].
- Use a graphics program, not PowerPoint, to resize your images to the size you want them to appear on the poster.
- Images will look very small when you view the entire poster at once. To get an idea of how the actual picture looks, view your poster at 100%. If it looks fuzzy on your monitor, it will look fuzzy when it prints.
- The minimum resolution for printed images is 300 dots per inch (DPI). If you take a 2″ X 2″ image at 300 DPI and resize it to 4″ X 4″, you have just halved the resolution to 150 DPI.
- For Macintosh users who want to insert graphs created in Excel: copy and paste the chart from Excel into a new large document (e.g., 2000 X 1300) in Graphic converter. Under the "Edit" menu, choose "Trim Selection" and then save the graph in .pct format (not .pict). Import into PowerPoint as above.
- To use a graph created in GraphPad, select the graph (in GraphPad) that you want to use on the poster. Click File >> Export >> and Save As Type (pull-down menu). Save the image, then insert it into PowerPoint as outlined above.